Administrators, or users in a security management role, can use the Report Security page to:
-
Set security access by user role for report groups and individual reports.
-
Set the order in which report groups and their respective reports display in the Report List pane. See Report List Pane.
-
Customize Report Overview descriptions.
Report Security Overview
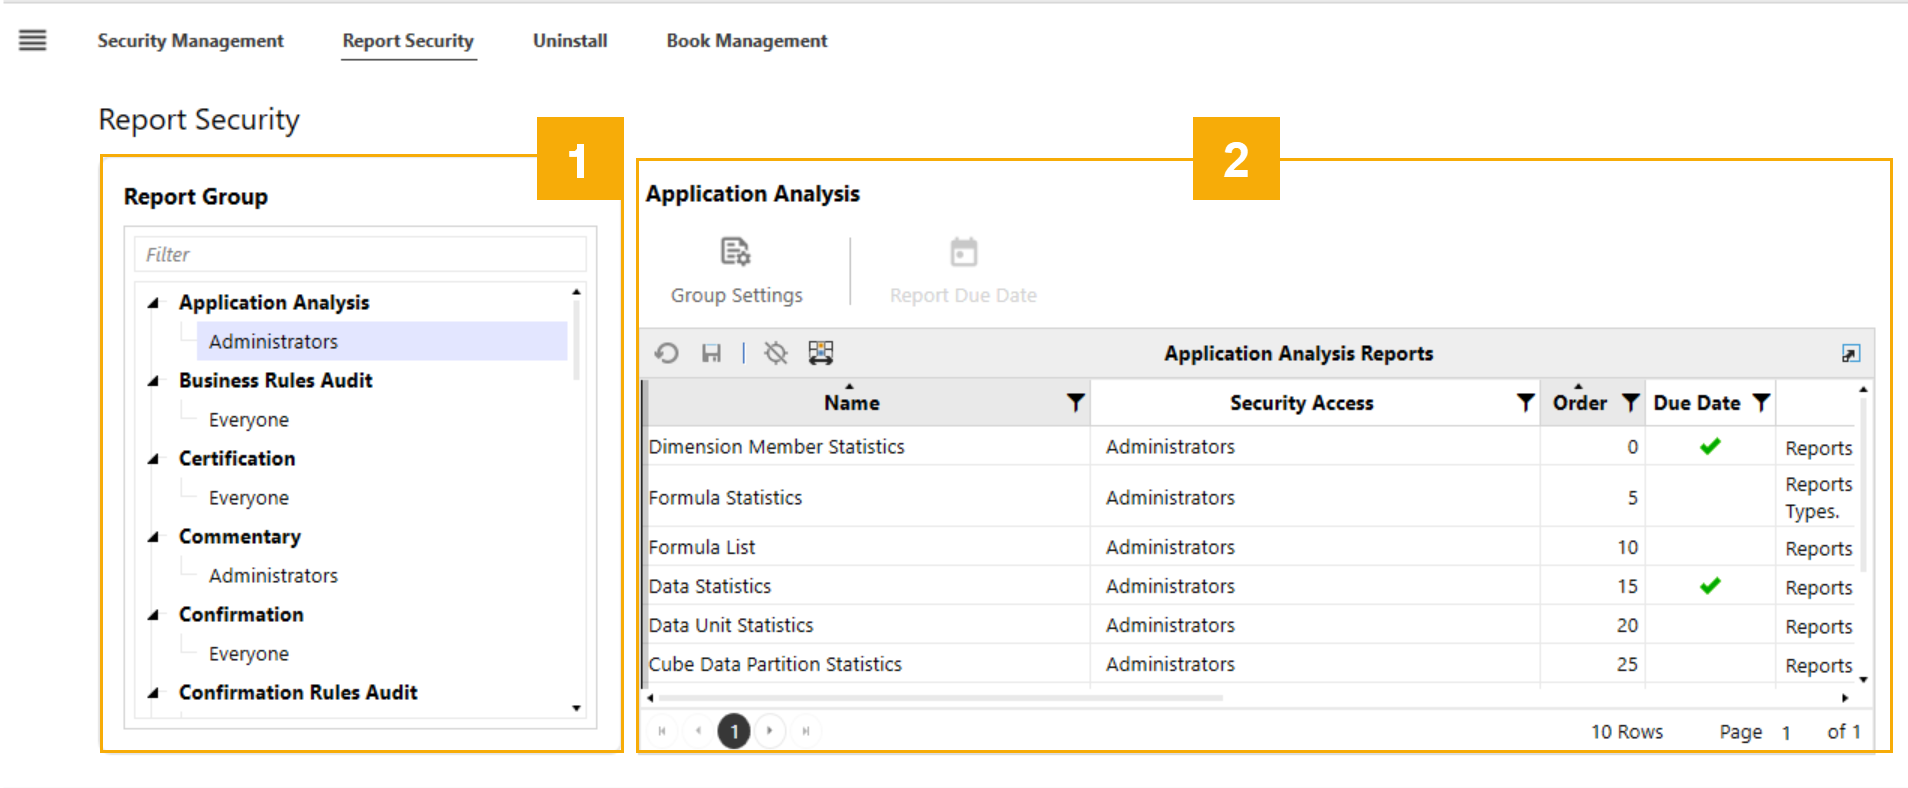
The Report Security page includes two panes:
-
Report Group: View a complete list of report groups and the current security group assigned.
-
Reports Pane: View all reports within the selected group. After you select a group, the Group Settings icon displays. See Set Report Groups and Report Security Access.
Reports Pane
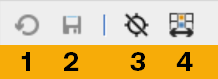
Button Bar
-
Cancel: This removes changes made to the report groups or reports since the last save. This icon is inactive in Navigation Center.
-
Save: This saves changes to report groups or reports. Changes are saved automatically so this icon will display as inactive.
-
Deselect All: This removes your selections.
-
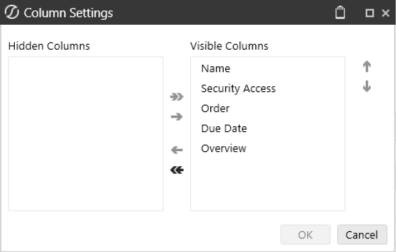
Column Settings: This is used to select the columns to display in the Reports pane. Click the Column Settings button to specify the columns you want to view in the grid.
Columns
The Reports grid displays the following information for each report:
-
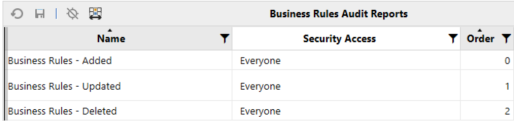
Name: The name of the report within the selected report group.
-
Security Access: This determines who can access the report within the specified report group.
-
Order: The order the report will be shown in the Report Group.
-
Due Date: The date the report is due.
-
Overview: The custom report description.
Set Security Access and Display Order
Security access settings determine which report groups and associated reports display to users. Display order, using the Order field, modifies the ranking of report groups and reports within the group. The lower the number the higher the sequential display ranking, starting with zero. If a display order is not set, report groups and reports display alphabetically.
NOTE: Only reports the user has access to will display in the report group.
Report Groups
Use the Report Groups pane to set security access and display order for report groups.
NOTE: If a user does not have security access to a report group, they will not see that report group, or its reports, in the Report List pane. See Report List Pane.
Follow the below steps to set security access and display order for report groups:
-
From the Report Security page, select a report group from the Report Groups pane. Information for the reports associated with the group will load in the Reports pane.
-
Click the Group Settings button.
-
In the Update Group Settings dialog box:
-
Select a security group from the Security Access drop-down menu.
-
Type a number in the Order field above the Reports pane.
NOTE: When the same rank is entered, all subsequent ranks advance in order.
-
-
Click the Save button.
Reports
Use the Reports pane to set security access and display order for each report in the selected report group.
NOTE: If a user does not have security access to a report group, they will not see that report group, or its reports, in the Report List pane. If they have access to at least one report within the group, the group name will display. See Report List Pane.
Follow these steps to set security access and display order for individual reports:
-
From the Report Security page, select a report group from the Report Groups pane. Information for the reports associated with the group will load in the Reports pane.
-
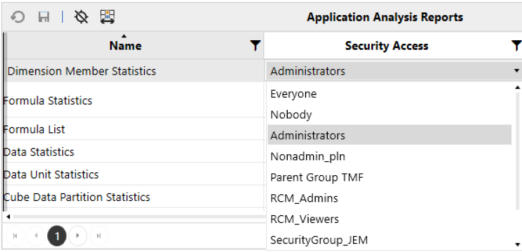
To set individual report security:
-
Select the report from the grid and double click the Security Access column to generate a drop-down.
-
Choose the appropriate security group.
-
Click the Save button in the Reports pane button bar.
-
-
To set individual report display order:
-
Select the report from the Reports grid and double click the Order column to edit the text field.
-
Type a number to set the sequential ordering of the report within the report order. For example, the following shows a report given an order of 0, which is the lowest order number for all the reports in the group, so it would appear first in the report display order.
-
Click the Save icon in the Reports pane button bar to save your changes.
-
Set Report Due Dates
Set Due Dates on reports so Navigation Center users easily see, and be notified, which reports are coming due.
NOTE: When a due date is set, a task is created in Task Scheduler where you can set the preferred time zone for your due date.
To set a due date for a report, follow these steps:
-
Select a report group from the Report Group pane.
-
Use the Reports Pane to select a report which enables the Report Due Date icon.
-
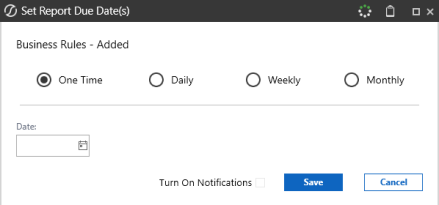
Click the Report Due Date button to open the Set Report Due Date(s) dialog box.
-
In the Set Report Due Date(s) dialog box, select the frequency of your due date:
-
One Time: When you select One Time, choose a date.
-
Daily: When you select Daily, choose a Starting date and repeat frequency. Optionally, you can select an Expire on date.
-
Weekly: When you select Weekly, turn on the preferred days of the week and choose a repeat frequency. Optionally you can select an Expire on date.
-
Monthly: When you select Monthly, turn on the preferred months and choose a repeat frequency, either a specific date or the first, second, third, fourth, or last, day of a month. Optionally, select an Expire on date.
-
-
Optionally select Turn On Notifications to send an email to the users assigned to the security group of the report on the date the report is due. The email will include the names of all reports due for the selected date.
NOTE: When the Turn on Notifications is enabled on the same day the report is due, no email will be sent.
-
Click the Save button.


